As the tools available in Azure are continuously being changed and improved, it is sometimes hard to find updated documentation with the most recent features. I experienced this myself when I was trying to process XML in Logic Apps for the first time.
This blog contains some of the possibilities of processing xml data within a Logic App that are currently available. The demo in this topic will show you how to transform, validate and perform XPath queries on an incoming xml message.
XML processing
In this hands-on demo we’ll be creating a Logic App that will trigger on receiving an XML message and do some XML manipulations before sending out a response.
Creating an Integration Account
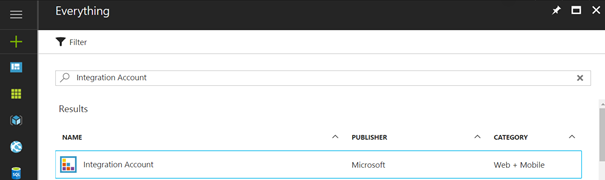
The first step is to create an Integration Account in Azure. This Integration Account will contain the XML Schemas and XML Transformations that we are going to use in our Logic App. In the Azure Portal, select “New” and search for “Integration Account”.
Provide the required information for the Integration Account and click the “Create”-button.

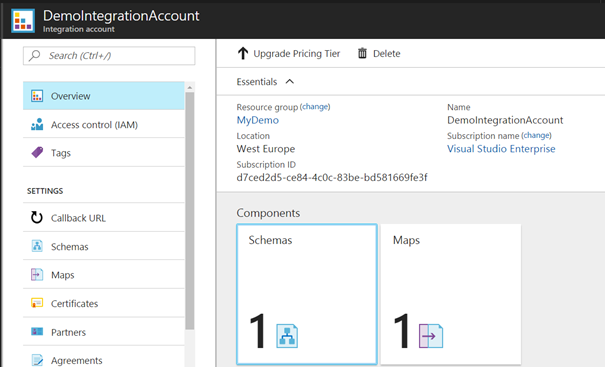
In the Integration Account, we are going to add 1 schema and 1 map.
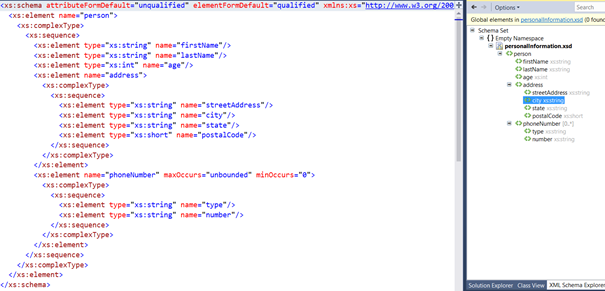
Create an XSD file with the structure as shown below. The schema contains personal information for a user to be created.
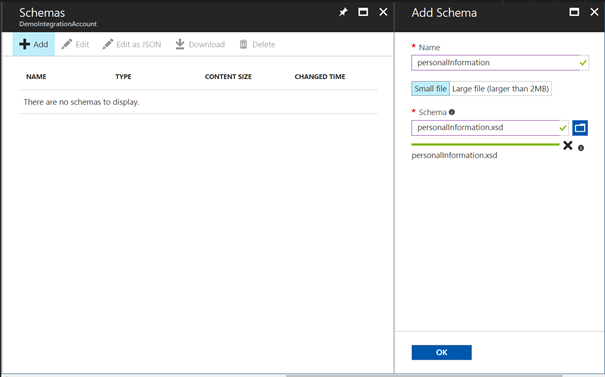
To add the created schema in your Integration Account, select the “Schemas” under the components. Choose a name for the Schema, and select the location where you have saved the schema.

Next we will be creating an XSLT transformation to transform the personal information into a user account. We will be using this transformation in a Logic App in a later step. To add this transformation to the Integration Account select the “Maps”-option in the Components field, and again choose a name for the file and select the created xsl file on your disk.
Designing the Logic App
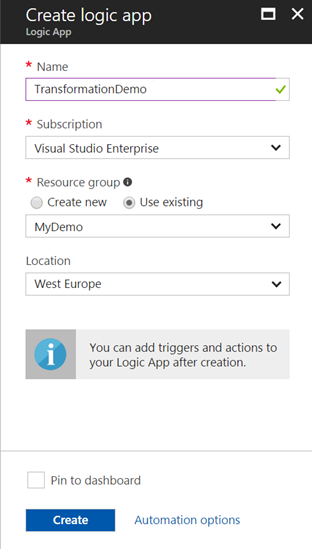
To create a logic app select “New” in the Azure Portal and search for “Logic App”.

Fill in the required fields, and click the “Create”-button.
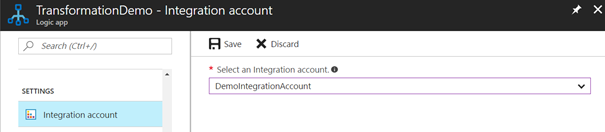
When the Logic App is created, we have to link the Integration Account created before, to the newly created Logic App. In the Logic App “Settings”-menu, select the Integration Account. Choose the Integration Account created before, and click “Save”. This will make the Schemas and Maps available for use within the Logic App.
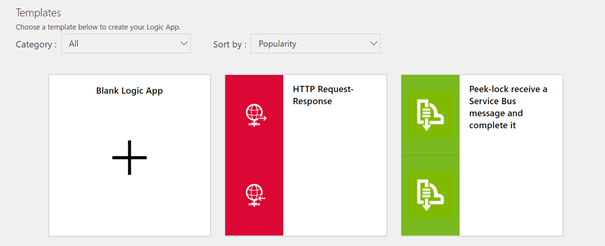
In the Logic App, go to the Design. We will start with a Blank Logic App in this demo.
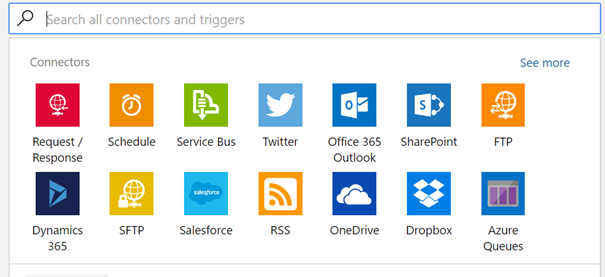
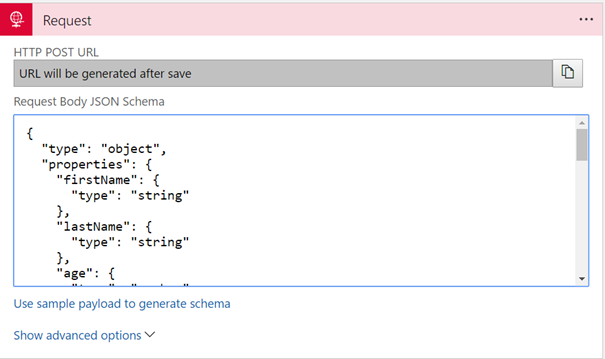
As the Logic App trigger, select a HTTP Request-Response Request.
In the JSON schema we will add the JSON equivalent of the XML schema we created. You can easily find a tool to transform an example XML to JSON. Then you can generate the JSON Schema using a sample payload.
{
  "type": "object",
  "properties": {
    "firstName": {
      "type": "string"
    },
    "lastName": {
      "type": "string"
    },
    "age": {
      "type": "number"
    },
    "address": {
      "type": "object",
      "properties": {
        "streetAddress": {
          "type": "string"
        },
        "city": {
          "type": "string"
        },
        "state": {
          "type": "string"
        },
        "postalCode": {
          "type": "string"
        }
      }
    },
    "phoneNumber": {
      "type": "array",
      "items": {
        "type": "object",
        "properties": {
          "type": {
            "type": "string"
          },
          "number": {
            "type": "string"
          }
        },
        "required": [
          "type",
          "number"
        ]
      }
    }
  }
}
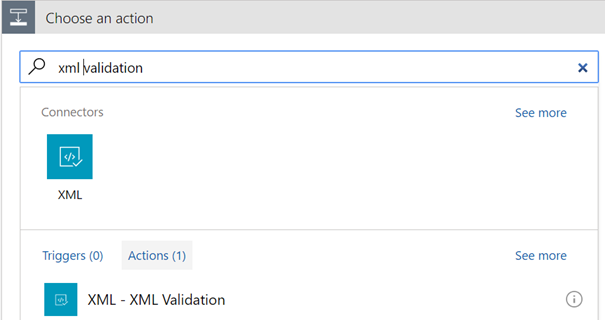
The first XML processing we will do is a XML validation. Add an action and search for “xml validation”.
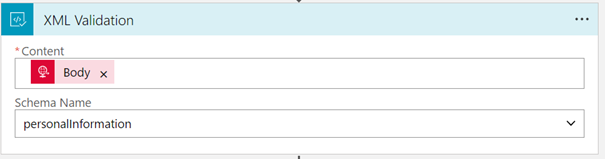
We will validate the incoming message against the schema we created in the Integration Account.
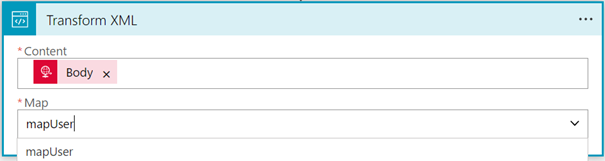
In the next step, we will be adding the transformation that was added to the Integration Account earlier in this demo. To do this, add an action and search for “Transform XML”. Select the Transform XML connector.

As content, select the incoming message body. If you select the Map, you will get a dropdown containing the transformations that are available in your Integration Account. Select the one you created earlier.
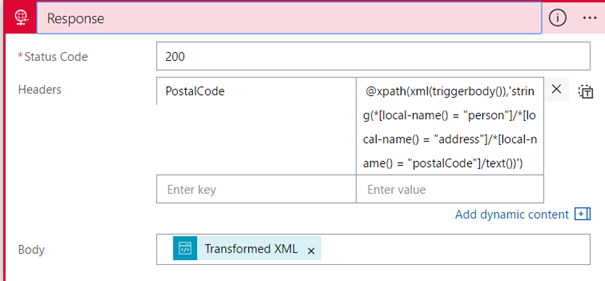
In the final step of this Logic App we will send the HTTP response back to the requester. Add an action and search for the “Request / Response”. Select the “Request / Response – Response” option.

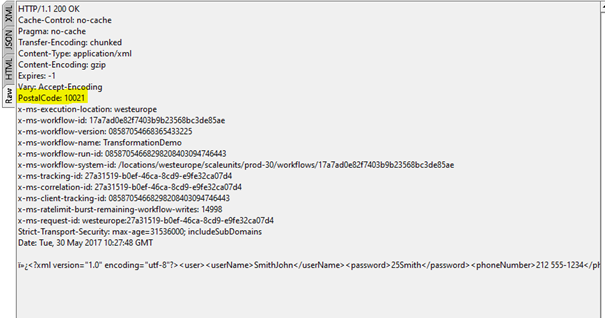
In the status code keep the default “200” status code (HTTP Success). For the headers we will use an XPath function to get a certain field out of the input message. This example is getting the value out of the “postalCode” field. The “triggerbody()”-parameter takes the body of the incoming triggermessage. In the Body field, just select the output from the XML transformation.
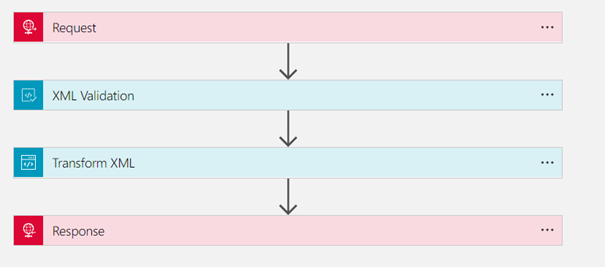
The complete Logic App should look like this now. Don’t forget to save your Logic App.
Testing the Logic App
To test the created Logic App, you will need a REST Client. In the example below I used SOAP UI. The request URL can be found in the “Request / Response – Request” connector.

Make sure you click the “Run” button in your Logic App before testing.

Select “application/xml” as media type. Create an example message based on the input XSD you created earlier. Send a request to the Logic App using the REST client. In the Response you should see the transformed XML.
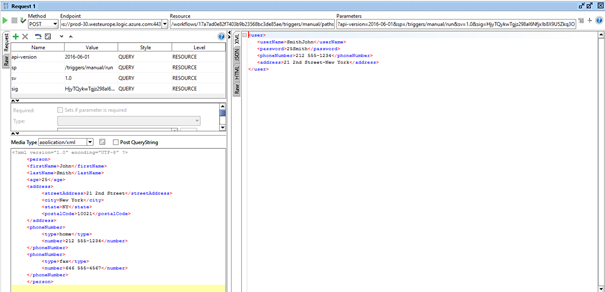
To validate the XPath query in the header, select the raw view. There you will see the Postal code in the headers.
Conclusion
While the standard message content type in a Logic App is JSON, it is also quite easy to do XML processing within a Logic App. The demo in this blog post is not a real business case, but it shows some XML functions that are frequently used in real integration scenarios.